Quickstart
This guide walks you through the complete AgentHiFive MVP flow: starting the platform, registering a user, creating a connection, setting up an agent with policies, and testing execution.
Make sure you have completed the Installation guide before proceeding. For SaaS users, you need an account at app.agenthifive.com with the OpenClaw plugin installed. For self-hosted users, you should have the development environment running with make up && make dev.
Step 1: Start the Development Environment
If your environment is not already running:
# Start PostgreSQL
make up

# Start both web and API servers
make dev
The web UI will be available at http://localhost:3000 and the API at http://localhost:4000.
Step 2: Register and Log In
Open your browser and navigate to http://localhost:3000.
- Click Sign Up to create a new account
- Register with email and password, or use a social login provider (Google, Microsoft)
- Check your email for a verification link and click it to verify your account
- After verification, log in to be redirected to the dashboard

AgentHiFive requires email verification before you can log in. If you are running locally with EMAIL_PROVIDER=noop (the default for development), verification emails are logged to the console instead of being sent. Check the API server output for a line containing the verification URL and open it in your browser.
Alternatively, set EMAIL_PROVIDER=smtp with an Ethereal account for a real inbox during development.
Step 3: Your Workspace
A workspace is automatically created when you register. It organizes your connections, agents, and policies. You can rename it from Settings in the sidebar.
All subsequent resources are scoped to this workspace.
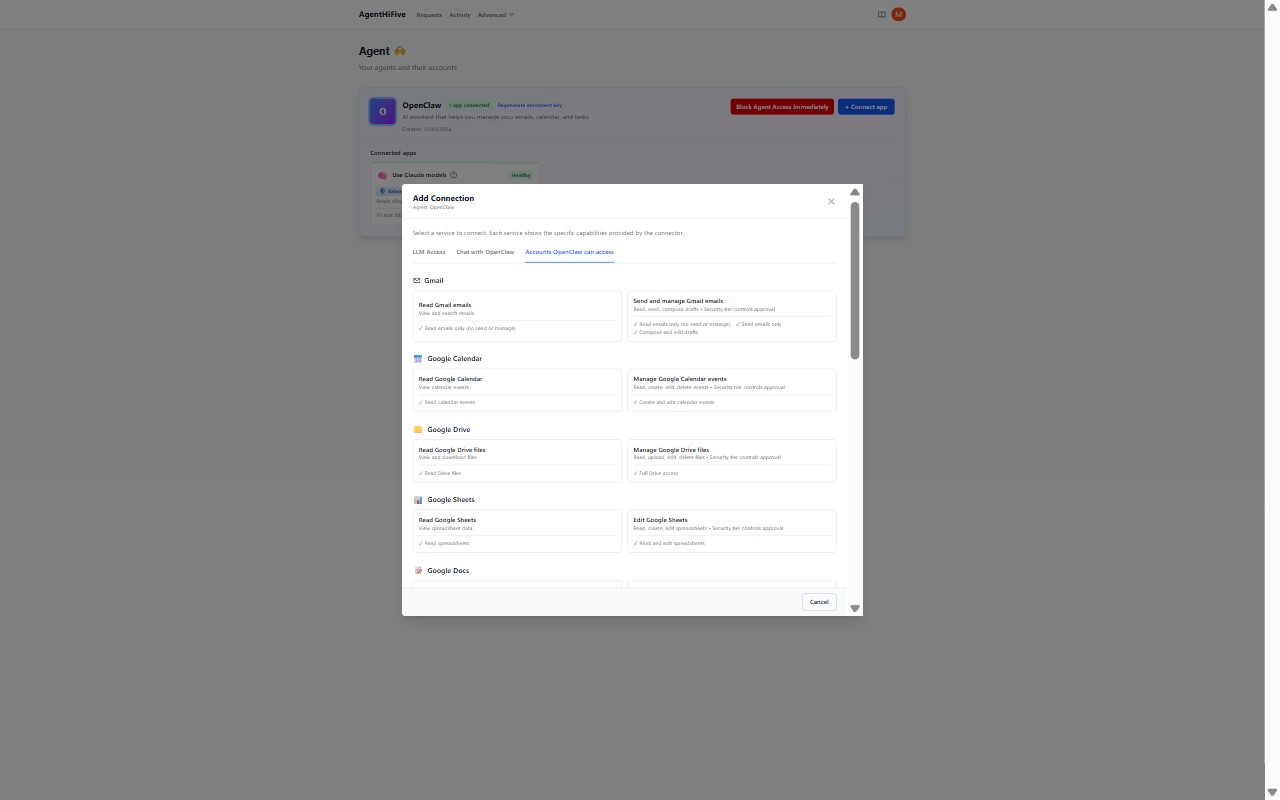
Step 4: Add a Connection
A connection links your external provider account to AgentHiFive. Navigate to Connections in the sidebar and click Add Connection.
OAuth Connections (Google, Microsoft)
For Google Workspace or Microsoft 365:
- Select the service (e.g., Gmail, Outlook Mail)
- Click Authorize — you will be redirected to the provider's consent screen
- Grant the requested permissions
- You will be redirected back to AgentHiFive with the connection active
Make sure you have configured the appropriate OAuth credentials (GOOGLE_CLIENT_ID and GOOGLE_CLIENT_SECRET, or MICROSOFT_CLIENT_ID and MICROSOFT_CLIENT_SECRET) in your .env file, and that your redirect URI (http://localhost:4000/v1/connections/callback) is registered in your provider's developer console. See the Google or Microsoft connection guides for details.
API Key Connections (Anthropic, OpenAI, Gemini, OpenRouter)
For LLM providers and other API-key services:
- Select the service (e.g., Anthropic, OpenAI)
- Enter your API key
- AgentHiFive validates the key and creates the connection
Bot Token Connections (Telegram, Slack)
For messaging platforms:
- Select the service (e.g., Telegram, Slack)
- Enter your bot token
- AgentHiFive validates the token and creates the connection
Step 5: Create an Agent
Agents represent the AI systems that will use your connections. Navigate to Agents in the sidebar:
- Click Create Agent
- Enter a name and description (e.g., "Email Assistant")
- Copy the bootstrap secret -- it is shown only once and expires in 1 hour
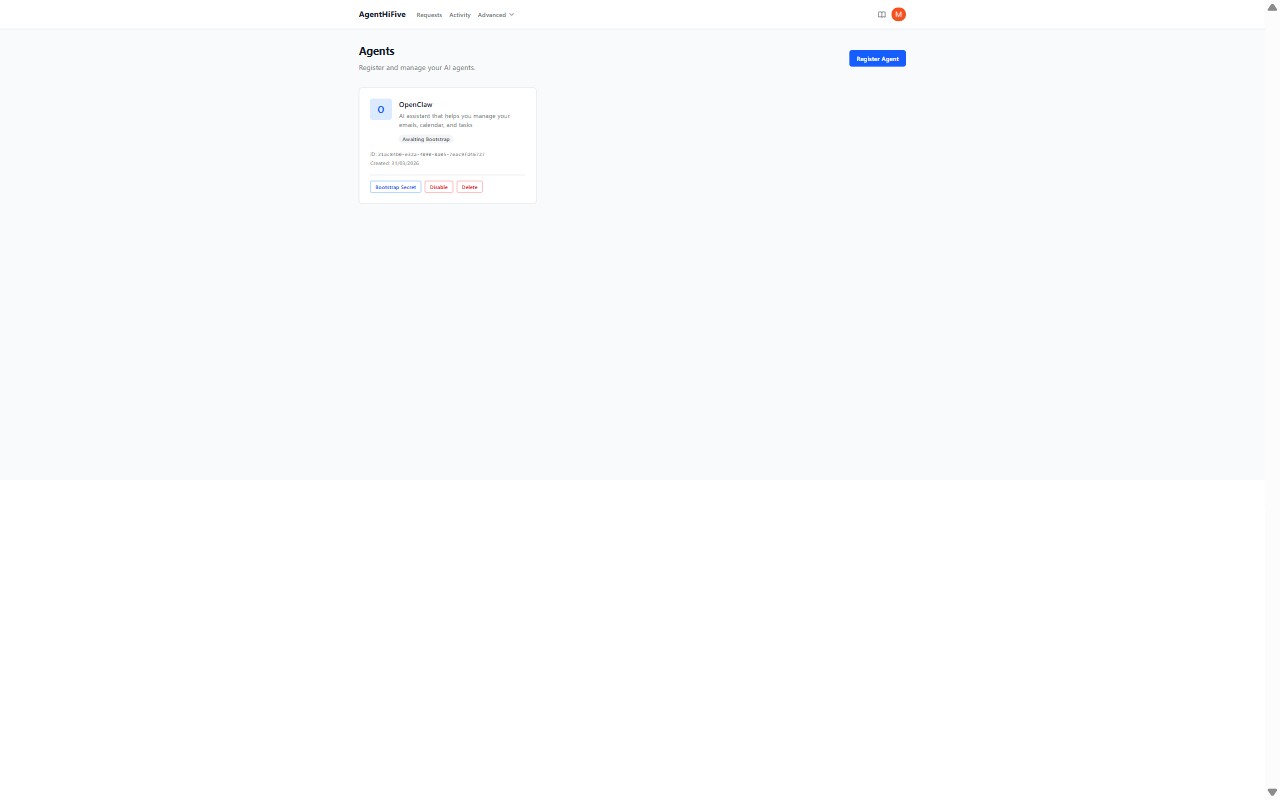
The agent is now in Awaiting Bootstrap status. To activate it, the agent must bootstrap with an ES256 public key:
import { AgentHiFiveClient } from "@agenthifive/sdk";
import { generateKeyPair, exportJWK } from "jose";

// Generate an ES256 key pair and bootstrap
const { publicKey, privateKey } = await generateKeyPair("ES256");
const publicJwk = await exportJWK(publicKey);

const result = await AgentHiFiveClient.bootstrap(
  "http://localhost:4000",
  "ah5b_...", // from the dashboard
  publicJwk,
);
After bootstrap, the agent status changes to Active and the SDK handles token refresh automatically. See the Agent Authentication reference for the full protocol details.
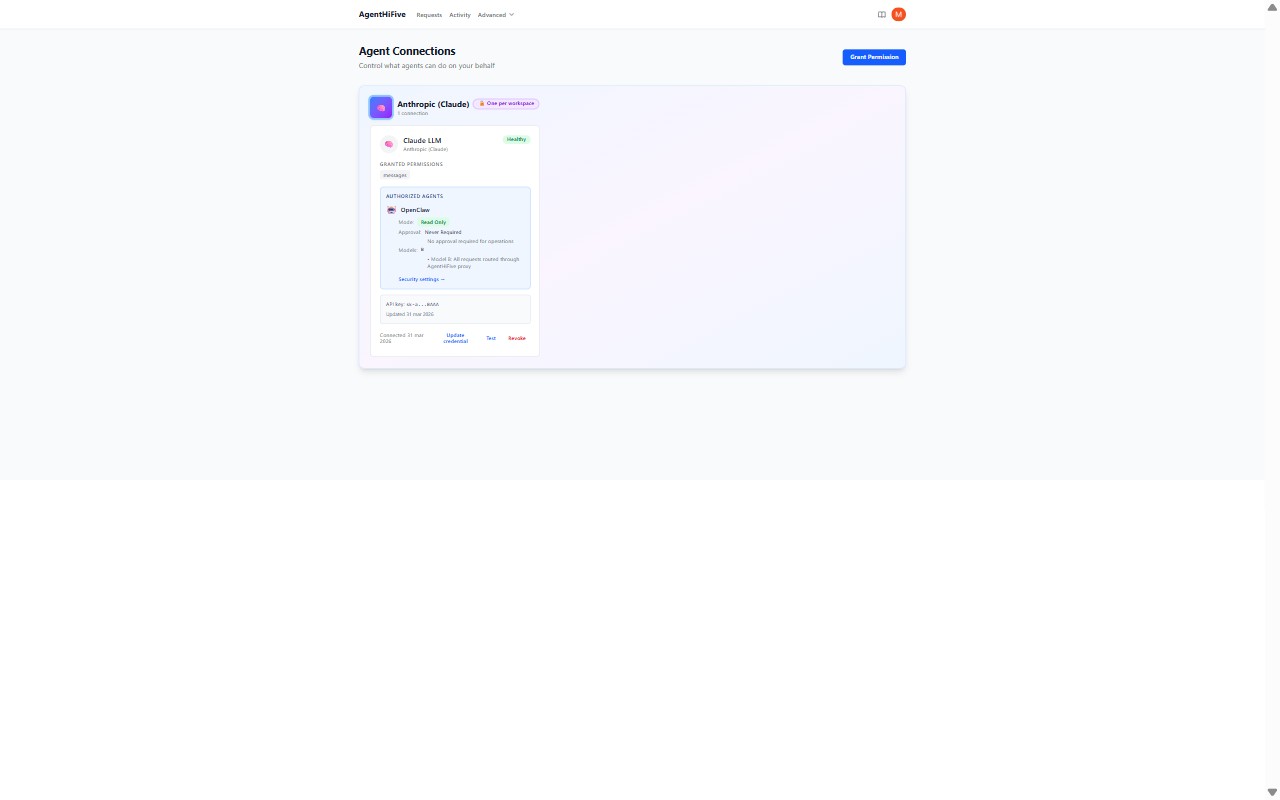
Step 6: Create a Policy Binding
A policy binding connects an agent to a connection with specific rules. Navigate to Policies in the sidebar:
- Click Create Policy
- Select the agent (e.g., "Email Assistant")
- Select the connection (e.g., your Google Workspace connection)
- Choose the execution model:
- Model A (Token Vending) -- agent receives short-lived tokens directly
- Model B (Brokered Proxy) -- agent sends requests through AgentHiFive
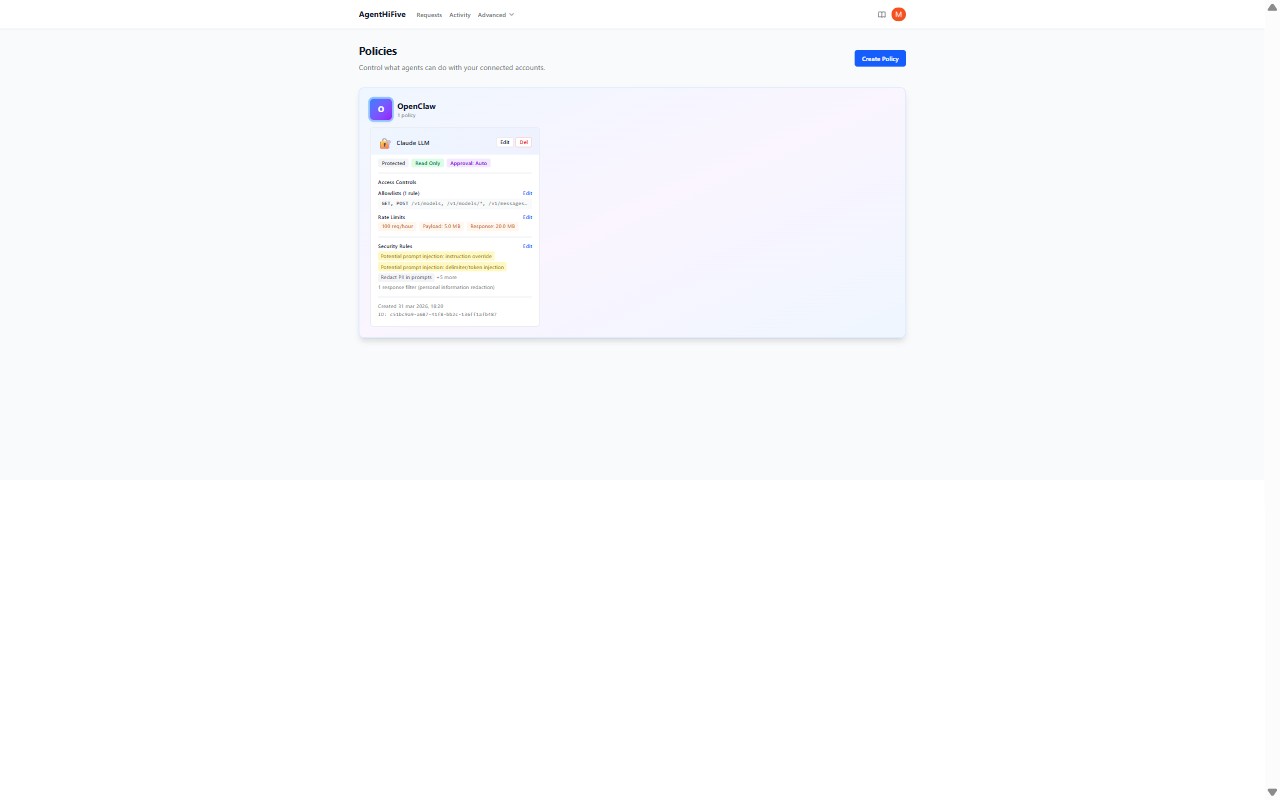
Step 7: Configure Guards and Rules
Within the policy, set up fine-grained controls:
- Allowlisted endpoints -- which provider API paths the agent may call (e.g.,
/gmail/v1/users/me/messagesfor read-only email access) - Rate limits -- maximum requests per time window (e.g., 100 requests per hour)
- Time windows -- when the agent is allowed to operate (e.g., business hours only)
- Approval gates -- require human approval for sensitive operations
These guards are enforced on every request, regardless of execution model.
Step 8: Test Execution via the API
Now test that your agent can call the provider through AgentHiFive.
Model A: Token Vending
Request a short-lived provider token:
# Request a scoped access token (use the ah5t_ token from the SDK)
curl -X POST http://localhost:4000/v1/vault/execute \
  -H "Content-Type: application/json" \
  -H "Authorization: Bearer ah5t_..." \
  -d '{
    "model": "A",
    "connectionId": "conn_xyz789"
  }'
Response:
{
  "model": "A",
  "accessToken": "ya29.a0AfH6SM...",
  "tokenType": "Bearer",
  "expiresIn": 3600,
  "auditId": "aud_abc123"
}
The agent can then use this short-lived token to call the Google API directly. When the token expires, the agent requests a new one.
Model B: Brokered Proxy
Send the provider API call through AgentHiFive:
# Proxy a request through AgentHiFive
curl -X POST http://localhost:4000/v1/vault/execute \
  -H "Content-Type: application/json" \
  -H "Authorization: Bearer ah5t_..." \
  -d '{
    "model": "B",
    "connectionId": "conn_xyz789",
    "method": "GET",
    "url": "https://gmail.googleapis.com/gmail/v1/users/me/messages",
    "query": {
      "maxResults": "5"
    }
  }'
Response:
{
  "model": "B",
  "status": 200,
  "headers": { "content-type": "application/json" },
  "body": {
    "messages": [
      { "id": "msg_001", "threadId": "thread_001" },
      { "id": "msg_002", "threadId": "thread_002" }
    ]
  },
  "auditId": "aud_def456"
}
With Model B, the agent never sees the provider credentials. AgentHiFive makes the call on the agent's behalf and returns the result.
Step 9: Review the Audit Trail
Every agent action is logged. Navigate to Audit Log in the dashboard to see:
- Which agent made the request
- Which connection and provider were used
- The API endpoint called
- Whether the request was allowed or denied
- Timestamp and response status
What You Have Accomplished
By completing this quickstart, you have:
- Set up the AgentHiFive development environment
- Created a user account and workspace
- Established an OAuth connection to an external provider
- Registered an AI agent
- Bound the agent to the connection with a policy
- Configured guards to constrain agent behavior
- Tested both execution models (token vending and brokered proxy)
- Reviewed the audit trail for agent actions
Next Steps
- Architecture -- Understand the full system design, token model, and module boundaries
- API Reference -- Complete endpoint documentation with request/response schemas
- Security -- Learn about the encryption model, JWT lifecycle, and threat mitigations
- SDK Documentation -- Integrate agents programmatically with the TypeScript SDK