SaaS Setup
Connect your OpenClaw agent to the hosted AgentHiFive platform. No Docker, no databases, no infrastructure to manage.
Prerequisites
- OpenClaw installed and running
- A web browser for the AgentHiFive dashboard
AgentHiFive plugin 0.4.7 is tested with OpenClaw 2026.5.28 and supports the 2026.5.x plugin/runtime layout. Check your local version with openclaw --version.
Step 1: Create Your Account
Sign up
Go to app.agenthifive.com and create an account. You can sign up with email/password or use Google or Microsoft social login.
Account creation wizard
After signing up, the account creation wizard guides you through initial setup. You can skip it at any time and configure everything later from the dashboard.
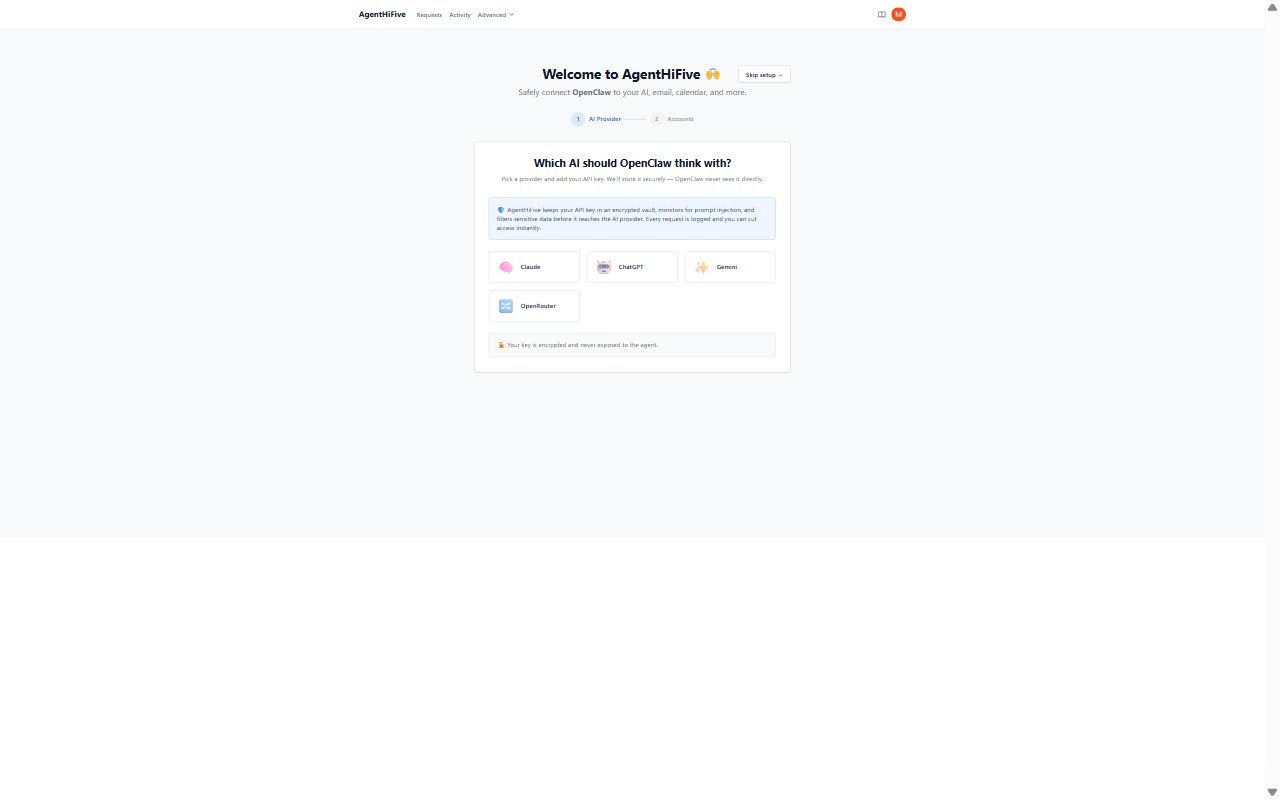
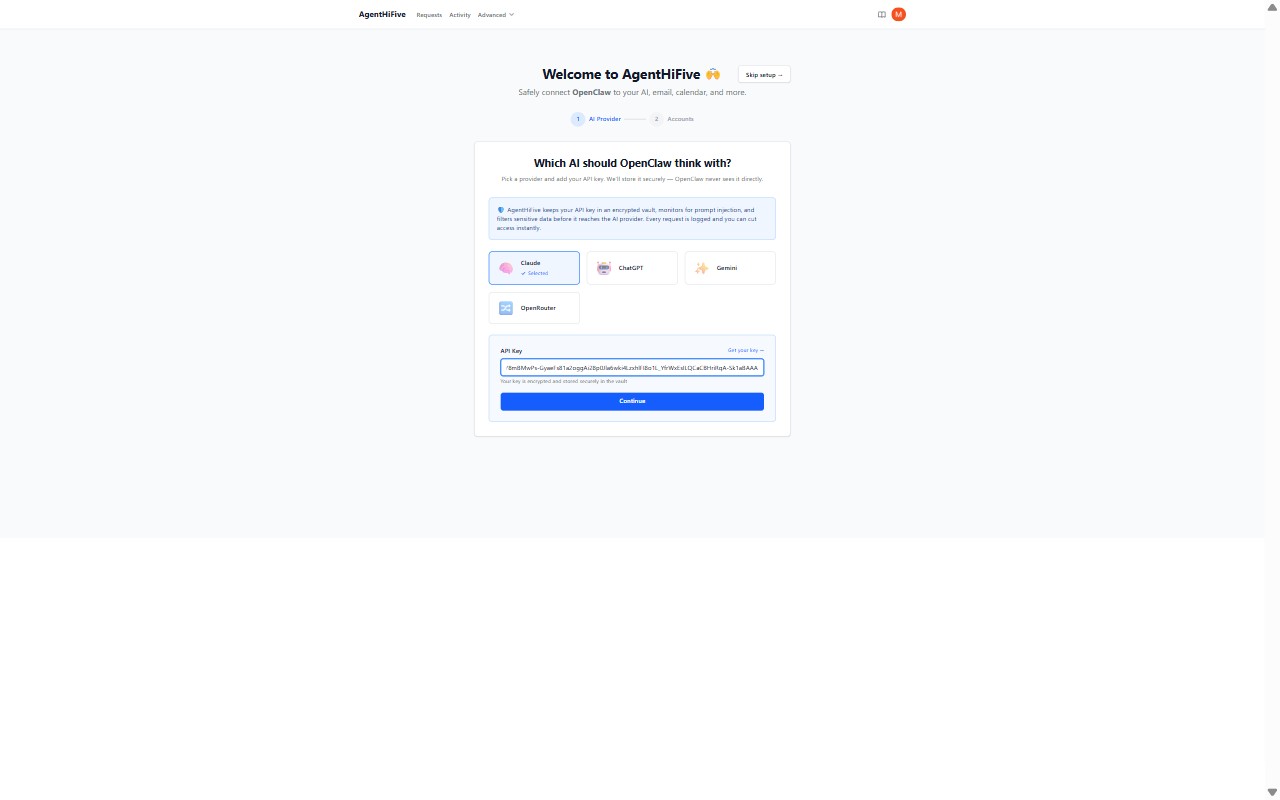
Choose an AI provider
The wizard asks which LLM provider your agent should use. Pick a provider (Claude, ChatGPT, Gemini, or OpenRouter), enter your API key, and click Continue.
Your key is encrypted and stored securely in the vault — OpenClaw never sees it directly.
For provider-specific setup details (where to get your key, supported models, etc.), see the Connections guides for Anthropic, OpenAI, Gemini, or OpenRouter.
Overview of available services
The next screen shows the services you can connect to later (Gmail, Calendar, Teams, Telegram, etc.). No connections are made here — it's just an overview of what's available. Click Finish setup to continue.

Copy your enrolment key
At the end of the wizard, you receive an enrolment key. Copy it — you'll need it when running the OpenClaw setup in Step 4.
The enrolment key is shown only once and expires in 1 hour. If you lose it or it expires, go to the AgentHiFive home page, find the agent card, and click Regenerate enrolment key.
Step 2: Connect Accounts
From the dashboard, connect the services your agent needs access to.
- On the AgentHiFive home page, click + Connect app on your agent card
- Choose a category tab: LLM Access, Chat with OpenClaw, or Accounts OpenClaw can access
- Click the service you want to connect (e.g., "Send and manage Gmail emails", "Read Google Calendar")
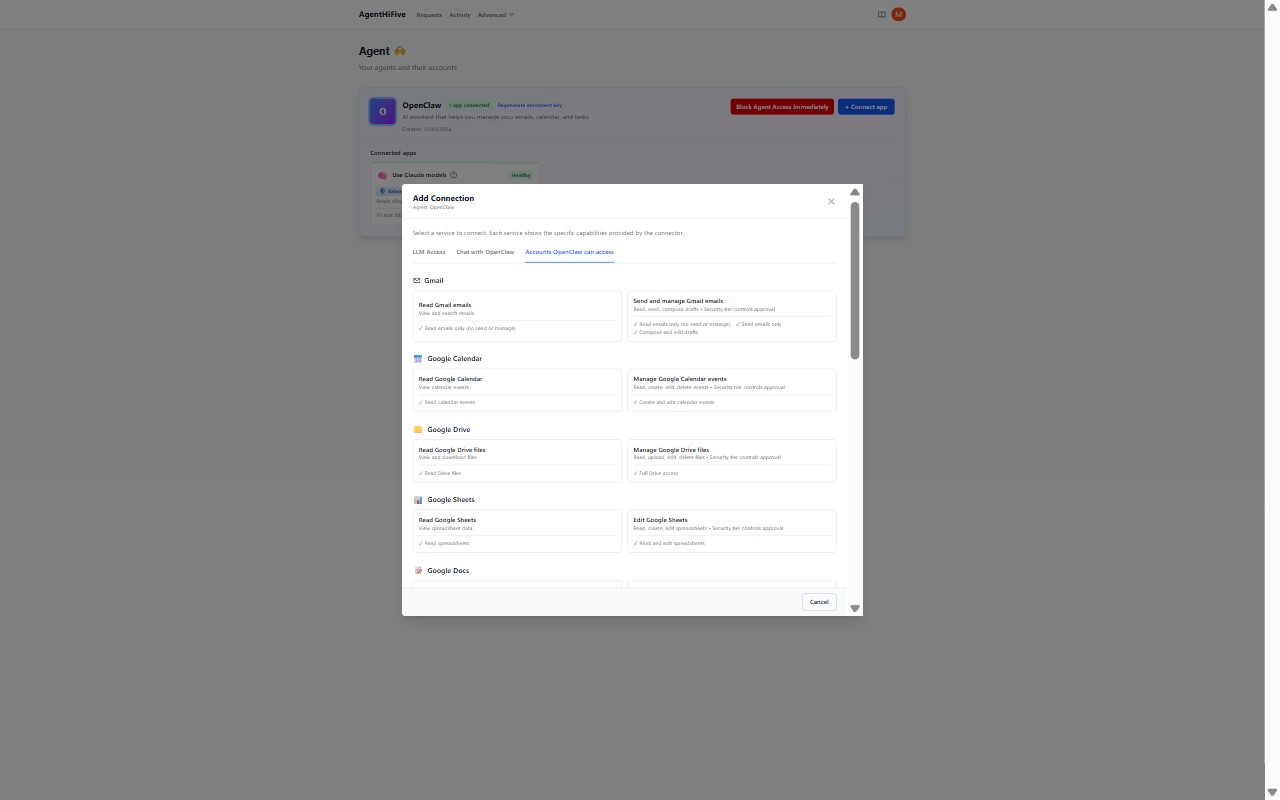
- Complete the authorization:
- OAuth services (Google, Microsoft): a popup opens to authorize access with the provider
- API key services (Notion, Trello, Jira): enter the API key or token and click Connect
- Bot tokens (Telegram, Slack): enter the bot token and click Validate & Connect
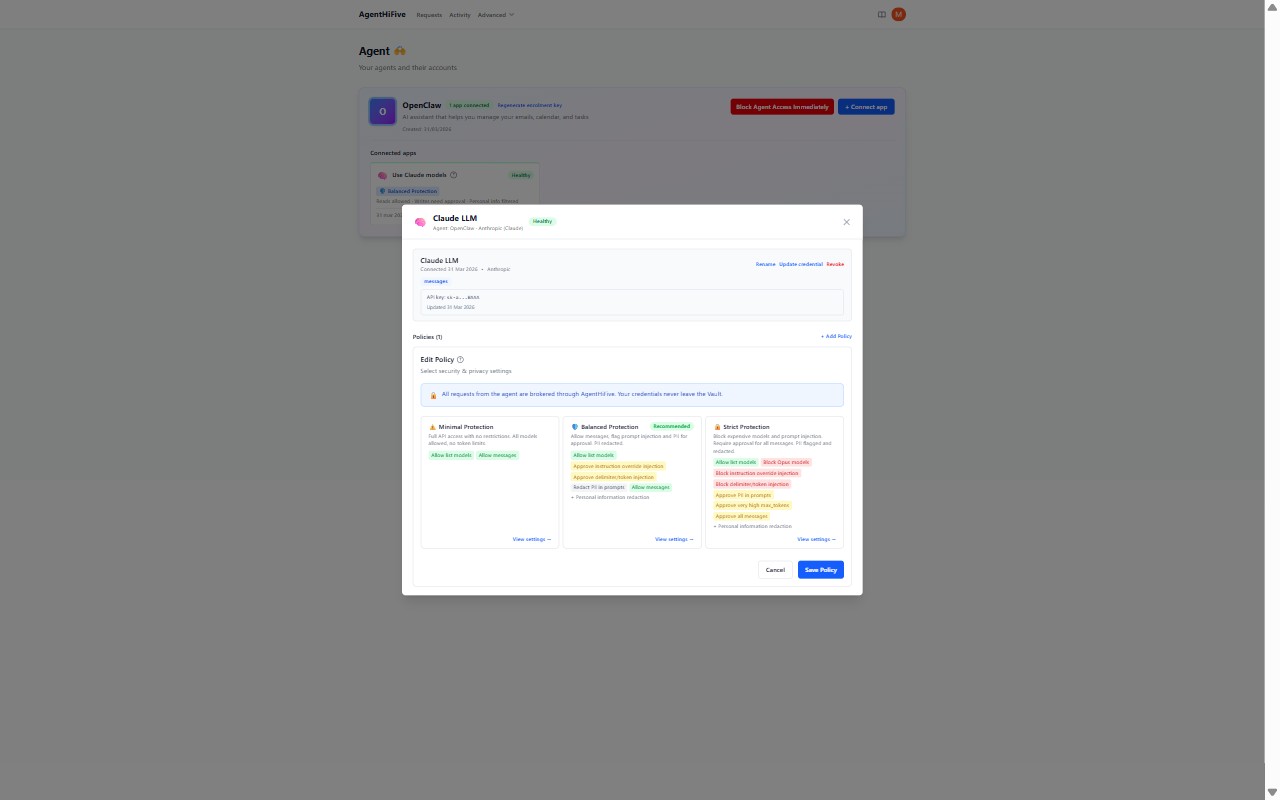
After the connection is created, you choose a security level for the policy:
- Minimal — Basic allowlists, no rate limits
- Standard — Moderate rate limits, PII redaction
- Strict — Tight rate limits, approval required for writes (recommended unless you need specific behaviors)
Your OpenClaw agent can also request access to a service when it needs one. You'll see the request in the dashboard where you can add credentials and select a policy — no need to set everything up in advance.
When a policy requires approval for a specific action (e.g., deleting an email), the agent tells the user to check the dashboard. You'll see the pending request with context (sender, subject, action) and can approve or deny with one click.
We recommend setting up a notification channel (e.g., Telegram or Slack) so you receive approval requests directly — you can approve them from the notification without opening the AgentHiFive dashboard.
Step 3: Install the OpenClaw Plugin
On the machine running OpenClaw, install the AgentHiFive plugin:
openclaw plugins install @agenthifive/agenthifive@0.4.7
We recommend pinning both the AgentHiFive plugin and OpenClaw versions to avoid unexpected changes. This guide was verified with @agenthifive/agenthifive@0.4.7, @agenthifive/openclaw-setup@0.2.19, and OpenClaw 2026.5.28. Check the latest AgentHiFive plugin release before upgrading.
Step 4: Run the Setup
Run the interactive setup:
npx @agenthifive/openclaw-setup@0.2.19
The setup will walk you through:
- Checking that OpenClaw is installed
- Entering your AgentHiFive base URL (default:
https://app.agenthifive.com) - Entering your enrolment key (from Step 1)
- Registering an ES256 key pair with AgentHiFive
- Fetching your vault connections and configuring the LLM provider
- Installing the plugin and applying integration patches
- Verifying the installation
For the full list of CLI options and advanced usage (non-interactive mode, reconnect, verify), see the Setup CLI Reference.
Step 5: Verify
Start the OpenClaw TUI:
openclaw tui
You should see a log line confirming the vault connection:
[plugins] AgentHiFive: token refreshed (prefix: ah5t...)
Try asking the agent something that uses a vault connection — for example, if you connected Gmail:
> show me my latest emails
The agent will use vault_execute to call the Gmail API through the vault. You can also use the WebTUI if you prefer a browser-based interface.
Next Steps
- Quickstart walkthrough — End-to-end API examples
- Setup CLI Reference — Full setup command options
- OpenClaw Plugin Guide — Tool reference and configuration
- Connections — Provider-specific setup guides